Contents
This chapter assists you in becoming familiar with the KDE desktop of your openSUSE®. If you have not yet installed your system, refer to Kapitel Installation mit YaST (↑Start).
KDE stands for K Desktop Environment and is an easy-to-use graphical user interface that communicates with the underlying Linux system to access and manage files, folders, and programs. It has many applications designed to help you in your daily work. KDE also offers many choices to modify your desktop according to your needs and wishes. Read more about configuring your desktop in Chapter 3, Customizing Your Settings.
The following description is based on the default configuration of the KDE 4 desktop shipped with your product. If you or your system administrator has modified the defaults, some aspects may be different, such as appearance or keyboard shortcuts.
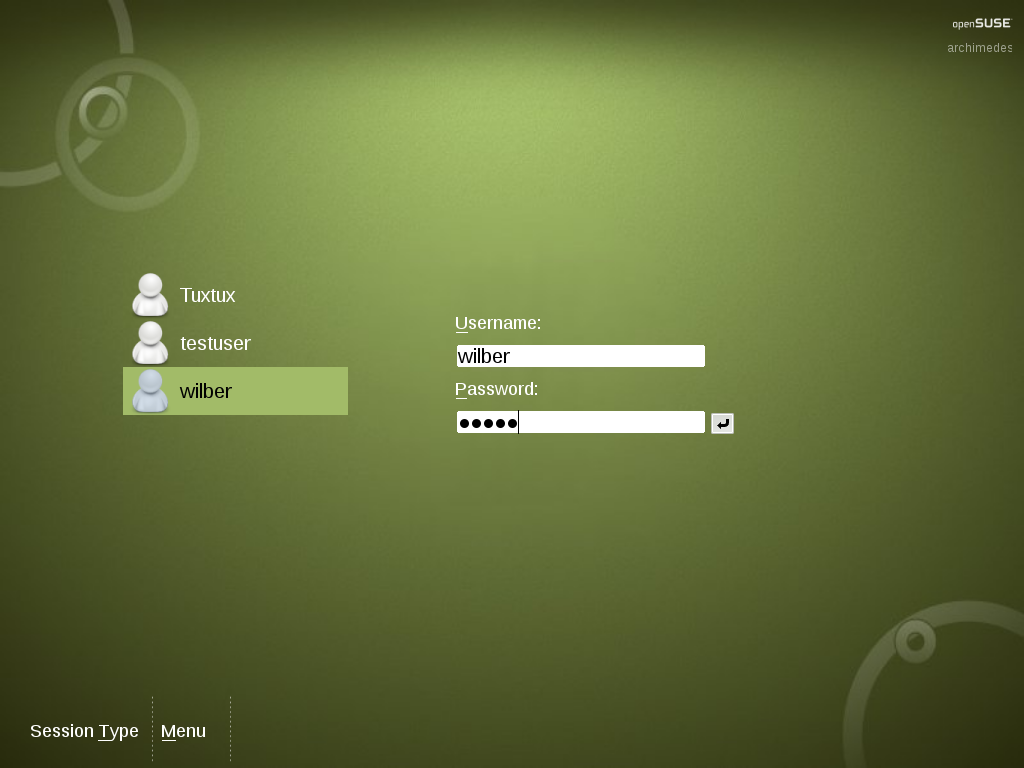
If more than one user account is configured on your computer, usually all users must authenticate—unless Auto Login is configured for a certain user. Auto login logs the user in to the desktop environment automatically on boot. This feature can be enabled or disabled during installation or at any time using the YaST user management module. For more information, see Kapitel Verwalten von Benutzern mit YaST (↑Referenz). If your computer is run in a network environment and you are not the only person using the machine, you are usually prompted to enter your username and password when you start your system. If you did not set up your system and your user account yourself, check with your system administrator for your username and password.
The appearance of the login screen depends on the product you use and on the desktop environment installed on your system. The login process is managed by an application. For KDE, it is KDM. If the GNOME desktop is additionally installed on your system, it may be GDM.
To start a normal login, enter your username and password. If desktops other than KDE are installed, you can select which desktop environment to start by clicking the menu item at the bottom of the login screen. Press Enter to proceed. For information on how to log out or switch to another desktop, see Section 1.3, “Leaving Your System” and Section 1.4, “Switching Desktops”.
If your system administrator has created an encrypted home directory for you (which is useful as a protection against theft or unauthorized removal of the hard disk), your home directory is mounted on login. After login, you can directly access the data as usual—without entering another password.
![[Note]](admon/note.png) | Connecting to an Active Directory Server |
|---|---|
To access shared network resources, you can also authenticate a KDE client machine against an Active Directory server. For further details, refer to Chapter 5, Accessing Network Resources. If your machine is configured for this kind of authentication, the login screen also provides an additional field. In this case, proceed as follows during login:
| |
After logging in to KDE for the first time, you see the KDE desktop. It consists of the following basic elements:
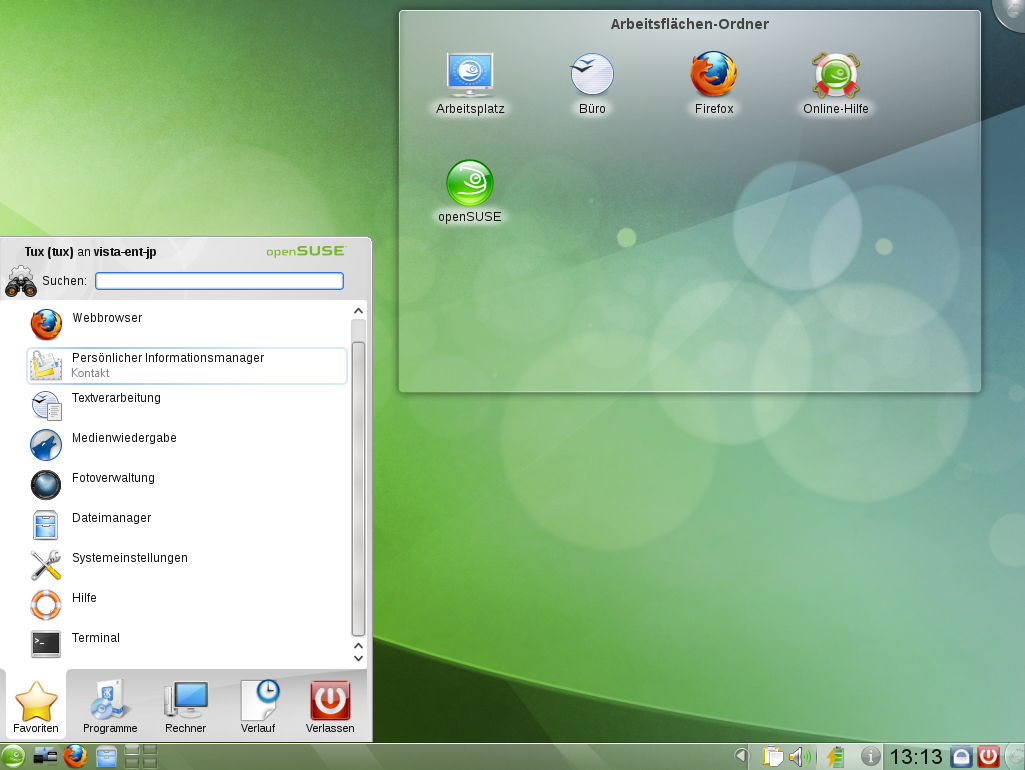
Desktop Icons and Desktop Folder.
Desktop icons represent files, directories, applications, functions, and
removable media, like CDs or DVDs. Click an icon on the desktop to
access its associated program or application. By default, your desktop
icons are shown in a , a transparent
region of the screen showing the contents of the
Desktop folder of your home directory. If you drag
an icon from the and drop it on
another part of the desktop, it appears as widget that you can tilt,
enlarge or minimize. Widgets are small applications that can be
integrated into your desktop. Right-click to open a context menu to
access the icon properties, or to remove the icon. For more information,
see Procedure 3.3, “Configuring Widgets”.
Desktop Context Menu: Right-click an empty area on the desktop to access the context menu for configuring the appearance of the desktop, adding panels or widgets to the desktop, locking the widgets in their current position, or for leaving the current session or locking the screen.
KDE Panel: The panel (in KDE also called “Kicker”) is a bar, typically located at the top or the bottom of the screen. By default, the panel of your KDE desktop consists of the following areas (from left to right): quick launcher with the main menu icon on the left and further program icons, pager (desktop previewer), taskbar, and system tray. You can add or remove icons in the panel and customize the appearance of the panel as well as its location on the desktop. If you hold your mouse pointer over an icon in the panel, a short description is displayed.
Quick Launcher: The quick launcher contains the main menu button and some larger icons that are shortcuts to frequently used programs, folders, and functions.
Main Menu Button: Use the icon at the far left of the panel to open a menu holding a search function at the top and several tabs at the bottom. The tab shows all installed programs in a function-oriented menu structure which makes it easy to find the right application for your purpose, even if you do not know the application names yet. For more information, refer to Section 2.1.1, “Using the Main Menu” .
Pager (Desktop Previewer): Between the quick launcher and the taskbar, find a miniature preview that shows your virtual desktops (if not configured otherwise, they are numbered). openSUSE allows you to organize your programs and tasks on several desktops, which minimizes the number of windows to arrange on the screen. To switch between the virtual desktops, click one of the symbols in the pager. For more information, refer to Section 2.6, “Using Virtual Desktops”.
Taskbar: By default, all started applications and open windows are displayed in the taskbar, which allows you to access any application regardless of the currently active desktop. Click to open the application. Right-click to see options for moving, restoring, or minimizing the window.
System Tray: This rightmost part of the panel usually holds some smaller icons, including the system clock displaying time and date, the volume control, and several other helper applications.
The integration and handling of desktop objects has changed from KDE 3.x to KDE 4, which now uses a new desktop and panel interface tool called Plasma. Plasma supports desktop widgets (also called “plasmoids”), similar to Apple’s dashboard widgets. Learn more about the key desktop objects in the following sections.
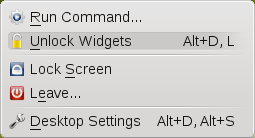
With KDE 4, desktop elements can be locked in their current position to prevent them from being moved around on the desktop. As long as the desktop elements are locked, you cannot add, move, or remove any objects to and from your desktop.
To lock or unlock the desktop elements, right-click an empty space on the desktop and select or .
Find how to add, remove and configure widgets and change numerous desktop elements in Chapter 3, Customizing Your Settings.
By default the , showing the contents
of the ~/Desktop folder, displays the following
icons:
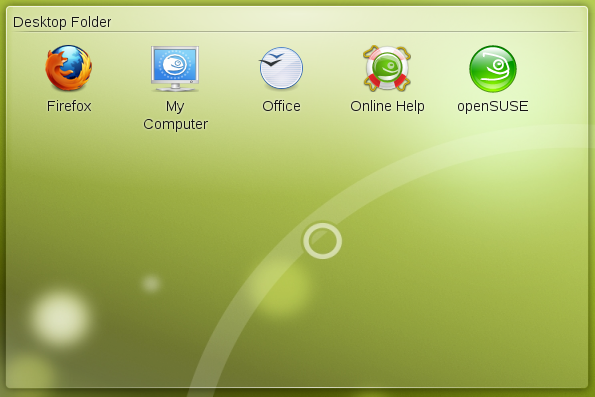
The icon is very useful for viewing the most important information about your hardware, network status, disks (hard disks, removable media, and external devices), operating system, and some common folders at one glance. For example, find processor type and speed listed there, information about your RAM and the current swap status, or your graphics card. lists the most important information about your operating system, such as the Kernel version included, the current user, version number and type of the operating system, as well as the KDE version number. openSUSE ships with a number of further tools (either graphical or command line tools) that you can use to get more detailed information about your system. If you need detailed hardware information about your system, use the YaST hardware probing, described in Abschnitt „Hardware-Informationen“ (Kapitel 2, Einrichten von Hardware-Komponenten mit YaST, ↑Start).
Opens the Firefox Web browser. For more information, refer to Chapter Browsing with Firefox (↑Application Guide).
Opens OpenOffice.org. For an introduction to the office suite, refer to Chapter The OpenOffice.org Office Suite (↑Application Guide).
Opens the SUSEgreeter which holds introductory information and links to various information sources on openSUSE.
Starts the default Web browser and takes you to the help page of the openSUSE community from where you can access various documentation resources, mailing lists, Web forums or chats with members of the openSUSE community. Find more information about accessing and using help resources (integrated with your system or on the Web) in Kapitel Hilfe und Dokumentation (↑Start).
The panel can be subdivided into three main areas holding icons: the quick launch area at the left, the taskbar in the middle and the system tray at the right. The taskbar has dynamic contents, showing the currently started applications and windows with their icons, whereas quick launcher and system tray are more static.
The quick launch area of your panel as shipped with openSUSE, includes the following icons by default:

- Main Menu Icon
Opens the main menu, similar to the Microsoft* Windows start menu. For more information, refer to Section 2.1.1, “Using the Main Menu” .
- Show Dashboard Icon
Hides all open windows and puts the widgets in front of them. Shows the cashew icon in the right upper corner of the desktop from which you can access a menu to configure your plasma workspace. For more information, refer to Procedure 3.6, “Using Different Options for Each Virtual Desktop”.
- Firefox Icon
Starts the Firefox Web browser. For more information, refer to Chapter Browsing with Firefox (↑Application Guide).
- Dolphin Icon
Opens Dolphin, the default file manager. For more information, refer to Section 2.2, “Using Dolphin File Manager”.
- Device Notifier Icon
Informs you about recently plugged or inserted devices such as USB sticks, external hard disks, cameras, CDs, and DVDs. For more information, refer to Section 2.5, “Accessing Removable Media and External Devices”.
Apart from the larger icons in the quick launcher, the panel also holds a number of smaller icons in the system tray area on the right:

KDE's clipboard tool that “remembers” the last entries you have moved to the clipboard. To view the clipboard contents, click the Klipper icon or press Ctrl+Alt+V. The most recent entry is listed on top and is marked as active with a black check mark. To insert the active clipboard entry again, move the mouse pointer to the target application, then middle-click. For more information on using Klipper, see Section 2.3, “Moving Text between Applications”.
Helps you keep your system up-to-date. When you connect to the Internet, openSUSE Updater automatically checks whether software updates for your system are available. The applet icon changes color and appearance depending on the availability of updates for your system. For detailed information on how to install software updates with openSUSE Updater and how to configure openSUSE Updater, refer to Kapitel YaST-Online-Update (↑Referenz).
Your desktop's default mixer (KMix) helps you to control sound on your desktop after your sound card has been detected and configured with YaST. By default, clicking the KMix icon in the system tray shows the master controller with which to increase or decrease the overall volume. For more information, refer to Section “Mixers” (Chapter 19, Playing Music and Movies: Amarok, Kaffeine and More, ↑Application Guide).
If you manage your network connection with NetworkManager and have enabled the use of NetworkManager in YaST, the NetworkManager icon also appears in your system tray be default. Use it to change and configure network connections. For detailed information, refer to Kapitel Verwenden von NetworkManager (↑Start).
This icons shows running jobs on your desktop (for example, if you are copying files) and notifies you about system events. Jobs are grouped to prevent the popup of too many dialogs and are automatically hidden after a few seconds. Animations signify that jobs are still running. Usually, the entries are automatically destroyed after some time, but in case you do not use your desktop during that time, they are retained, so you can safely stay away from your computer for a couple of hours, and when you come back, you will still be able to see which jobs have been finished during your absence. To configure which information to show or to disable auto-hiding, right-click the Job & Notifications icon and select .
For information about the current date and time, click the clock in the system tray or move your mouse pointer over the clock. You can change the clock settings (such as appearance and additional data to be displayed) from the context menu available upon right-click. If you need to update the system time, start YaST and select +. Refer to Abschnitt „Uhr und Zeitzone“ (Kapitel 1, Installation mit YaST, ↑Start) for more information.
Locks your screen and starts the screen saver. Access to the session can only be regained with a password.
Logs you out and ends your current KDE session. If not configured otherwise in the KDE 4 Personal Settings (see Procedure 3.16, “Adjusting the Session Handling”, the session manager will restore the currently open windows by default next time you log in to KDE.
- Cashew Icon
Give access to panel configuration options. For more information, see Procedure 3.8, “Customizing the Panel”.
You can change the way your KDE desktop looks and behaves to suit your own personal tastes and needs. To learn how to configure individual desktop elements or how change the overall appearance and behavior of your desktop, refer to Section 3.1, “Personal Settings - Overview”.
If you would like to start working with your desktop now, continue reading at Chapter 2, Working with Your Desktop. Otherwise you can leave your system with one of the possibilities described below.
When you have finished using the computer, there are several
options for leaving your system. Some of them will leave the system
running, others will shutdown the computer. If your system provides power
management, you can also choose to suspend your
computer. In this state, it will consume considerably less power than
usual and will start much faster than after a complete shutdown and
reboot. For more information, refer to
Chapter 9, Controlling Your Desktop’s Power Management.
You can access all the options to leave your system from the main menu. Click the main menu icon on the left and switch to the tab. Select one of the following options:
Ends your current session and leaves your system running. If not configured otherwise in the KDE 4 Personal Settings, the session manager will restore the currently open windows by default the next time you log in to KDE 4. Find more information about the session manager and configuration options at Procedure 3.16, “Adjusting the Session Handling”.
Prevents unauthorized access by others by locking your screen and starting a screen saver. Access to the session can only be regained with a password. To unlock, enter your normal login password. For information about configuring your screen saver, see Procedure 3.7, “Configuring the Screen Saver”.
Starts a second session with a graphical user interface on your machine. Your current session remains active while you are taken to the login screen where you can log in as a different user. You can access the first session again by pressing Ctrl+Alt+F7. To access a new session, press F8 instead of F7. Additional sessions can be accessed by pressing Ctrl+Alt+F9 to F12.
If more than one desktop environment is installed on your system, you can also choose to switch to another desktop for the new session as described in Section 1.4, “Switching Desktops”.
This menu item is only available if your computer provides power management functionality. Pauses your computer without logging you out. All your data and the session data is saved to disk before the system is laid to rest. It is thus protected against data loss should you lose power in the meantime. Waking the system up again is much faster than with a fresh boot.
This menu item is only available if your computer provides power management functionality. Pauses your computer without logging you out. All your data and the session data is saved to RAM. Bringing the system up again is faster than restoring a session from disk.
Logs you out and turns your computer off.
Initiates the shutdown process and reboots your computer. Instead of selecting the desired boot option in the boot manager, you can also select the desired option directly—just click one of the options below .
Alternatively, you can also use the desktop context menu or the icons in the system tray to leave your system.
If you have already logged out, you can still access shutdown and restart option from the login screen by clicking and selecting the relevant menu items.
If more than one desktop environment is installed on your system (for
example, KDE and GNOME, or KDE 3.5.x and KDE
4), you can choose to switch to another desktop when logging in again (or
when logging in as a different user). To do so, proceed as follows:
On the login screen, click and select the desktop environment to start.
Enter a valid username and password. A new session on the selected desktop environment starts.
To switch back again, log out from the current desktop and select a different on the login screen. If you do not select a new session type, your next session will be of the same type as the session before.