| openSUSE-Dokumentation Part IV. Multimedia / Chapter 23. Managing Your Digital Image Collection | ||||
|---|---|---|---|---|
 | 22.7. For More Information | 23.2. Downloading Pictures from the Camera |  | |
| openSUSE-Dokumentation Part IV. Multimedia / Chapter 23. Managing Your Digital Image Collection | ||||
|---|---|---|---|---|
| 22.7. For More Information | 23.2. Downloading Pictures from the Camera | | |
Contents
Managing digital photographs in Linux is very straightforward. KDE's digiKam downloads your images directly from your camera. It helps you organize and manipulate your images to get the best possible result to present to others. The application includes several useful plug-ins that can convert your images to various different formats. Image improvement plug-ins also include red eye reduction, speck removal and hot pixel removal. Various filter and effect plug-ins help create little works of art from your digital images.
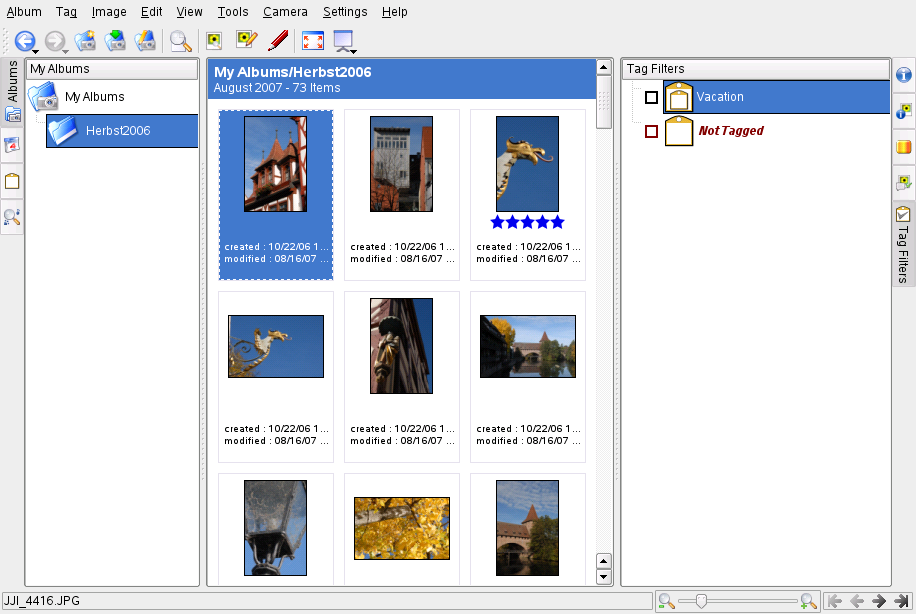
Start digiKam from the main menu or by pressing Alt+F2 and entering digikam. On start-up, digiKam shows a window with two main areas: a list of your albums to the left and the images in the current album to the right. See Figure 23.1, “The Main Window of digiKam”. The rightmost edge of the window has a number of tabs attached which can be used to display important information about your images or to manipulate certain image-related data:
Use this tab to access properties assigned to your images, such as file properties (permissions, ownership, modification date, etc.), image properties (dimensions, file format, etc.), and photograph properties (basic model, exposure and aperture information).
Use this tab to access various kinds of metadata associated with your images, such as EXIF and GPS, for example.
Use this tab to access color management-related data and to analyze the histograms associated with your images.
Use this tab to assign comments, tags or ratings to your images.
Use to filter the amount of images displayed in the main view using tagging information. For details about tagging in digiKam, refer to Section 23.4, “Managing Tags”.
To download images from your digital camera, simply connect the camera to the USB port of your computer using the USB cable provided by the camera manufacturer. Depending on your camera model, you may need to switch your camera to a special data transfer mode. Consult the camera's manual about this.
There are four possibilities for accessing the pictures on the camera:
USB Mass Storage. If your camera can be switched to a USB mass storage device, select this option. After you connect the camera to the USB port of your computer and turn the camera on, the new USB device is automatically detected and mounted. KDE lets you select the action to take in the event of any such device being mounted. You can choose to start digiKam or any other image viewing or processing application whenever a device of this type is mounted.
PTP (Picture Transfer Protocol, also Known as PictBridge). If your camera can be switched to PTP, select this option. Normally your camera is not automatically mounted in PTP mode but can be accessed through digiKam.
Special Drivers and Gphoto2. If your camera neither supports USB mass storage nor PTP, try the special drivers provided by gphoto2, see Section 23.10, “Troubleshooting”
Card Readers. Nowadays cameras can use different non-volatile memory cards, for example SD memory card, compact flash (CF), memory stick, to name a few. Some new computers have a card reader on board with different slots, to support all these formats. If you do not want to deal with cabels, protocols, or drivers, select this option as it simplifies a lot. Normally, card readers are detected as removeable devices and are automatically mounted in KDE.
To set up a camera in digiKam, select ++. First, try to detect the camera automatically with . If this fails, browse the list of supported cameras for your model with . If your camera model is not included in the list, try an older model or use USB/IEEE mass storage camera and confirm with .