Contents
Abstract
K3b is a comprehensive KDE program for writing data and audio CDs and DVDs. Start the program from the main menu or by entering the command k3b. The following sections brief you on how to start a basic burning process.
To create a data CD or DVD, proceed as follows:
Select ++. The project view appears in the lower part of the window.
Drag and drop the desired files and directories from the file list to the project folder.
Save the project under a name of your choice with +.
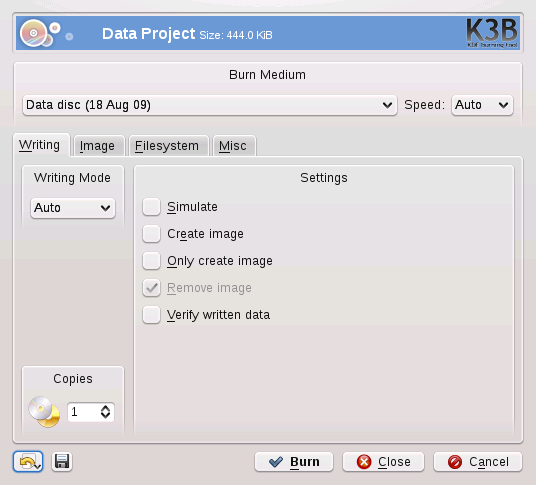
Select + from the menu or hit Ctrl+B. A dialog opens with four tabs offering various options for writing the CD or DVD (see Figure 22.1.)
Select the . The detected medium and writer are displayed under this pop-up menu. If you have more than one writer installed, choose which one you want to use here.
Choose the burning speed, usually .
![[Warning]](admon/warning.png)
Select the Writing Speed with Care Normally, you should select Auto, which chooses the maximum writing speed possible. However, if you increase this value but your system is not able to send the data fast enough, you possibly get faulty disks due to buffer underruns. If you get these kind of errors, choose a lower writing speed to be on the safe side.
Set the name of the medium under +. If you need more detailed information, set your additional data with . In most cases you can leave the options as there is.
Start the process with .
Basically, there are no significant differences between creating an audio CD and creating a data CD. Proceed as follows:
Select + from the main menu.
Drag and drop the individual audio tracks to the project folder. The audio data must be in WAV or Ogg Vorbis format. Determine the sequence of the tracks by moving them up or down in the project folder.
If necessary, change the start and end offset of the audio source. Right-click and choose . Correct the start and end offset and proceed with .
Click to open the dialog window.
Specify the parameters to adjust burning speed and other options. When burning audio CDs, choose a lower burning speed to reduce the risk of burning errors and improve longevity of your media.
When you mix your audio CD with tracks from different albums, in most cases recording levels vary. You can adjust the volume in the tab with the option.
Start the actual burning process using .
The previous procedure is useful in most cases. However, you can improve your audio CD with the help of CD Text. With the help of , you are able to add certain text information to a CD (such as CD title, artist name, and track name). CD players that support this feature can read and display this information. To add CD text information to your audio tracks, select the track first. Right-click and select and enter your information in the window that opens. You can also download track information from the Internet by clicking .
To copy a CD or DVD, proceed as follows:
Insert the medium you want to copy.
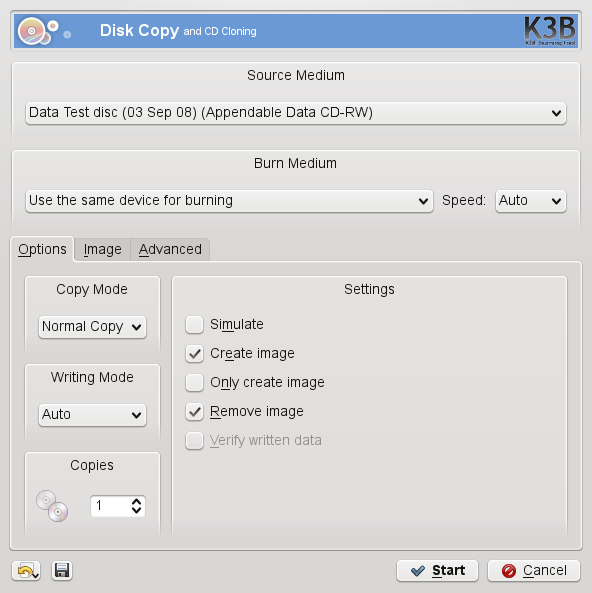
Click + from the main menu. A dialog box appears as shown in Figure 22.2.
Specify the source drive you want to copy.
Check to cache data to the hard disk before writing them on a target medium.
Check to create an image in the path specified in the tab in the option and burn the image later.
Click to begin with the process.
If you already have an ISO image, go to + or +. Enter the location of the in the window that opens. K3b calculates a check sum and displays it in . Make sure to compare the ISO files you downloaded from the Internet with the MD5 sum provided by the source of the image. If the sums are different, the image has not been downloaded correctly.
Choose the medium and writer to use in . Select the writing speed. Set your preferences, such as number of copies in . Use the tool tip to display a short note. To burn the disk, click .
Multisession disks can be used to write data in more than one burning session. This is useful, for example, for writing backups that are smaller than the media. In each session, you can add another backup file. The interesting part is that you are not only limited to data CDs or DVDs. You can also add audio sessions to a multisession disk.
![[Note]](admon/note.png) | About Storage Space on Multisession Disks |
|---|---|
Be aware that multisession disks need space to keep an account of all the entries from your sessions. This leads to a smaller amount of available space on your disk. The amount depends on the number of sessions. | |
To start a new multisession disk, do the following:
Create your data disk first as described in Section 22.1, “Creating a Data CD or DVD” and add all your files. You cannot start with an audio CD session. Make sure that you do not fill up the entire disk, because otherwise you cannot append a new session.
Click .
Start the burning session with .
After a successful burning process, you have created a multisession disk. As long as the media contains enough space, you can append more sessions if you like. Finish disks with (in the tab) only if you are sure you do not need any new sessions or the space is occupied.
Apart from the functions described above, K3b offers other functions, such as ripping music from audio CDs, rewriting CDs, and more. You can find more informations about K3b at http://k3b.org/.