Chapter 36. Using Tablet PCs
Contents
openSUSE® comes with support for Tablet PCs. In the following, learn how to install and configure your Tablet PC and discover some useful Linux* applications which accept input from digital pens.
The following Tablet PCs are supported:
Tablet PCs with serial and USB Wacom tablet (pen based), touch-screen or multi-touch devices.
Tablet PCs with FinePoint devices, such as Gateway C210X/M280E/CX2724 or HP Compaq TC1000.
Tablet PCs with touch screen devices, such as Asus R2H, Clevo TN120R, Fujitsu Siemens Computers P-Series, LG C1, Samsung Q1/Q1-Ultra.
After you have installed the Tablet PC packages and configured your digitizer correctly, input with the pen (also called a stylus) can be used for the following actions and applications:
Logging in to KDM or GDM
Unlocking your screen on the KDE and GNOME desktops
Actions that can also be triggered by other pointing devices (such as mouse or touch pad), for example, moving the cursor on the screen, starting applications, closing, resizing and moving windows, shifting window focus and dragging and dropping objects
Using gesture recognition in applications of the X Window System
Drawing with GIMP
Taking notes or sketching with applications like Jarnal or Xournal or editing larger amounts of text with Dasher
36.1. Installing Tablet PC Packages
The packages needed for Tablet PCs are included in the
TabletPC installation pattern—if this is
selected during installation, the following packages should already be
installed on your system:
cellwriter: a character-based hardwriting input paneljarnal: a Java-based note taking applicationxournal: an application for note taking and sketchingxstroke: a gesture recognition program for the X Window Systemxvkbd: a virtual keyboard for the X Window Systemx11-input-fujitsu: the X input module for Fujitsu P-Series tabletsx11-input-evtouch: the X input module for some Tablet PCs with touch screensxorg-x11-driver-input: the X input module for input devices, including the module for Wacom devices.
If these packages are not installed, manually install the packages you
need from command line or select the TabletPC
pattern for installation in YaST.
36.2. Configuring Your Tablet Device
During installation, your tablet or touch device is configured by default. If you have trouble with the configuration of your Wacom device, you use xsetwacom on the command line to change the settings.
36.3. Using the Virtual Keyboard
To log in to the KDE or GNOME desktop or to unlock the screen, you can either enter your username and password as usual or via the virtual keyboard (xvkbd) displayed below the login field. To configure the keyboard or to access the integrated help, click the field at the left lower corner and open the xvkbd main menu.
If your input is not visible (or is not transferred to the window where you need it), redirect the focus by clicking the key in xvkbd and then clicking into the window that should get the keyboard events.
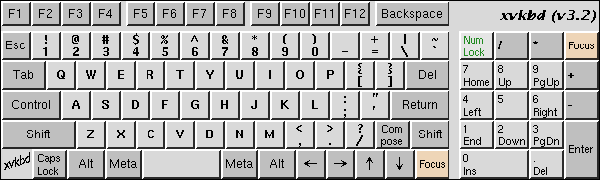
If you want to use xvkbd after login, start it from the main menu or with xvkbd from a shell.
36.4. Rotating Your Display
Use KRandRTray (KDE) or gnome-display-properties (GNOME) to rotate or resize your display manually on the fly. Both KRandRTray and gnome-display-properties are applets for the RANDR extension of the X server.
Start KRandRTray or gnome-display-properties from the main menu, or enter krandrtray or gnome-display-properties to start the applet from a shell. After you have started the applet, the applet icon is usually added to your system tray. If the gnome-display-properties icon does not automatically appear in the system tray, make sure is activated in the dialog.
To rotate your display with KRandRTray, right-click the icon and select . Select the desired orientation from the configuration dialog.
To rotate your display with gnome-display-properties, right-click the icon and select the desired orientation. Your display is immediately tilted to the new direction. The orientation of the graphics tablet changes also, so it can still interpret the movement of the pen correctly.
If you have problems changing the orientation of your desktop, refer to Section 36.7, “Troubleshooting” for more information.
36.5. Using Gesture Recognition
openSUSE includes both CellWriter and xstroke for gesture recognition. Both applications accept gestures executed with the pen or other pointing devices as input for applications on the X Window System.
36.5.1. Using CellWriter
With CellWriter, you can write characters into a grid of cells—the writing is instantly recognized on a character basis. After you have finished writing, you can send the input to the currently focused application. Before you can use CellWriter for gesture recognition, the application needs to be trained to recognize your handwriting: You need to train each character of a certain map of keys (untrained characters are not activated and thus cannot be used).
Procedure 36.1. Training CellWriter
Start CellWriter from the main menu or with cellwriter from the command line. On the first start, CellWriter automatically starts in the training mode. In training mode it shows a set of characters of the currently chosen key map.
Enter the gesture you would like to use for a character into the respective character's cell. With the first input, the background changes its color to white, whereas the character itself is shown in light gray. Repeat the gesture multiple times until the character changes its color to black. Untrained characters are shown on a light gray or brown background (depending on the desktop's color scheme).
Repeat this step until you have trained CellWriter for all characters you need.
If you want to train CellWriter for another language, click the button and select a language from the tab. the configuration dialog. Click the button and select the key map from the drop-down box at the bottom right corner of the window. Now repeat your training for the new map of keys.
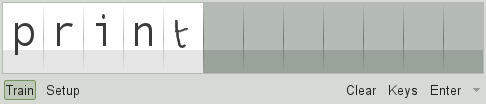
After having finished the training for the map of keys, click the button to switch to the normal mode.
In the normal mode, the CellWriter windows shows a couple of empty cells in which to enter the gestures. The characters are not sent to another application until you click the button, so you can correct or delete characters before you use them as input. Characters that have been recognized with a low degree of confidence will appear highlighted. To correct your input, use the context menu that appears on right-clicking a cell. To delete a character, either use your pen's eraser, or middle-click with the mouse to clear the cell. After finishing your input in CellWriter, define which application should receive the input by clicking into the application's window. Then send the input to the application by clicking .
If you click the button in CellWriter, you get a virtual keyboard that can be used instead of the handwriting recognition.
To hide CellWriter, close the CellWriter window. The application now appears as icon in your system tray. To show the input window again, click the icon in the system tray.
36.5.2. Using Xstroke
With xstroke, you can use gestures with your pen or other pointing devices as input for applications on the X Window System. The xstroke alphabet is a unistroke alphabet that resembles the Graffiti* alphabet. When activated, xstroke sends the input to the currently focused window.
Start xstroke from the main menu or with xstroke from a shell. This adds a pencil icon to your system tray.
Start the application for which you want to create text input with the pen (for example, a terminal window, a text editor or an LibreOffice Writer).
To activate the gesture recognition mode, click the pencil icon once.
Perform some gestures on the graphics tablet with the pen or another pointing device. xstroke captures the gestures and transfers them to text that appears in the application window that has the focus.
To switch focus to a different window, click the desired window with the pen and hold for a moment (or use the keyboard shortcut defined in your desktop's control center).
To deactivate the gesture recognition mode, click the pencil icon again.
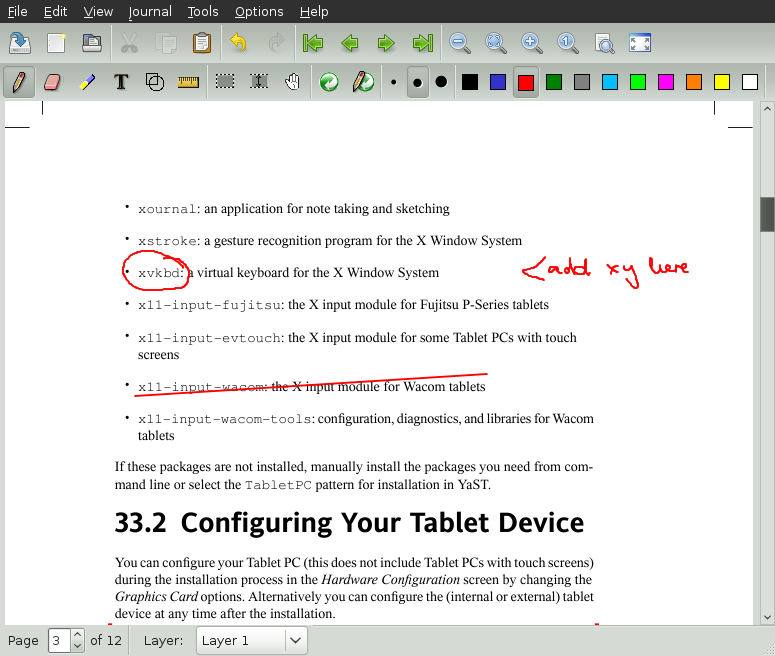
36.6. Taking Notes and Sketching with the Pen
To create drawings with the pen, you can use a professional graphics editor like GIMP or try one of the note-taking applications, Xournal or Jarnal. With both Xournal and Jarnal, you can take notes, create drawings or comment PDF files with the pen. As a Java-based application available for several platforms, Jarnal also offers basic collaboration features. For more information, refer to http://www.dklevine.com/general/software/tc1000/jarnal-net.htm. When saving your contents, Jarnal stores the data in an archive format (*.jaj) that also contains a file in SVG format.
Start Jarnal or Xournal from the main menu or by entering jarnal or xournal in a shell. To comment a PDF file in Xournal, for example, select + and open the PDF file from your file system. Use the pen or another pointing device to annotate the PDF and save your changes with +.
Dasher is another useful application. It was designed for situations where keyboard input is impractical or unavailable. With a bit of training, you can rapidly enter larger amounts of text using only the pen (or other input devices—it can even be driven with an eye tracker).
Start Dasher from the main menu or with dasher from a shell. Move your pen in one direction and the application starts to zoom into the letters on the right side. From the letters passing the cross hairs in the middle, the text is created or predicted and is printed to the upper part of the window. To stop or start writing, click the display once with the pen. Modify the zooming speed at the bottom of the window.

The Dasher concept works for many languages. For more information, refer to the Dasher Web site, which offers comprehensive documentation, demonstrations and training texts. Find it at http://www.inference.phy.cam.ac.uk/dasher/
36.7. Troubleshooting
- Virtual Keyboard Does Not Appear on Login Screen
Occasionally, the virtual keyboard is not displayed on the login screen. To solve this, restart the X server by pressing ++ or press the appropriate key on your Tablet PC (if you use a slate model without integrated keyboard). If the virtual keyboard still does not show, connect an external keyboard to your slate model and log in using the hardware keyboard.
- Orientation of the Wacom Graphics Tablets Does Not Change
With the xrandr command, you can change the orientation of your display from within a shell. Enter xrandr
--helpto view the options available. To simultaneously change the orientation of your graphics tablet, the command needs to be modified as described below:For normal orientation (0° rotation):
xrandr -o normal && xsetwacom --set "Serial Wacom Tablet" Rotate NONE
For 90° rotation (clockwise, portrait):
xrandr -o right && xsetwacom --set "Serial Wacom Tablet" Rotate CW
For 180° rotation (landscape):
xrandr -o inverted && xsetwacom --set "Serial Wacom Tablet" Rotate HALF
For 270° rotation (counterclockwise, portrait):
xrandr -o left && xsetwacom set --"Serial Wacom Tablet" Rotate CCW
Note that the commands above depend on the output of the xsetwacom list command. Replace
"Serial
      Wacom Tablet"
with the output for the stylus or the touch device. If you have a Wacom device with touch support (you can use your fingers on the tablet to move the cursor), you need to rotate also the touch device.
36.8. For More Information
Some of the applications mentioned here do not offer integrated online
help, but you can find some useful information about usage and
configuration in your installed system in
/usr/share/doc/package/
or on the Web:
packagename
For the Xournal manual, refer to http://xournal.sourceforge.net/manual.html
The Jarnal documentation is located at http://www.dklevine.com/general/software/tc1000/jarnal.htm#documentation
Find the xstroke man page at http://davesource.com/Projects/xstroke/xstroke.txt
Find a HOWTO for configuring X on the Linux Wacom Web site: http://linuxwacom.sourceforge.net/index.php/howto/x11
Find a very informative Web site about the Dasher project at http://www.inference.phy.cam.ac.uk/dasher/
Find more information and documentation about CellWriter at http://risujin.org/cellwriter/
Information on gnome-display-properties can be found at http://old-en.opensuse.org/GNOME/Multiscreen