Chapter 27. Support
Contents
This chapter outlines maintenance-related tasks. Learn how to update Novell® AppArmor and get a list of available man pages providing basic help for using the command line tools provided by Novell AppArmor. Use the troubleshooting section to learn about some common problems encountered with Novell AppArmor and their solutions. Report defects or enhancement requests for Novell AppArmor following the instructions in this chapter.
27.1. Updating Novell AppArmor Online
Updates for Novell AppArmor packages are provided in the same way as any other update for openSUSE. Retrieve and apply them exactly like for any other package that ships as part of openSUSE.
27.2. Using the Man Pages
There are man pages available for your use. In a terminal, enter man apparmor to open the apparmor man page. Man pages are distributed in sections numbered 1 through 8. Each section is specific to a category of documentation:
Table 27.1. Man Pages: Sections and Categories
|
Section |
Category |
|---|---|
|
1 |
User commands |
|
2 |
System calls |
|
3 |
Library functions |
|
4 |
Device driver information |
|
5 |
Configuration file formats |
|
6 |
Games |
|
7 |
High level concepts |
|
8 |
Administrator commands |
The section numbers are used to distinguish man pages from each other.
For example, exit(2) describes the exit system
call, while exit(3) describes the exit C library
function.
The Novell AppArmor man pages are:
unconfined(8)autodep(1)complain(1)enforce(1)genprof(1)logprof(1)change_hat(2)logprof.conf(5)apparmor.conf(5)apparmor.d(5)apparmor.vim(5)apparmor(7)apparmor_parser(8)
27.3. For More Information
Find more information about the AppArmor product on the Novell AppArmor product page at
Novell:
http://www.novell.com/linux/security/apparmor//. Find
the product documentation for Novell AppArmor, including this document, at
http://www.novell.com/documentation/apparmor/ or in the
installed system in /usr/share/doc/manual.
There are specific mailing lists for AppArmor that users can post to or join to communicate with developers.
- apparmor-general@forge.novell.com
This is a mailing list for end users of AppArmor. It is a good place for questions about how to use AppArmor to protect your applications.
- apparmor-dev@forge.novell.com
This is a developer mailing list for AppArmor developers and community members. This list is for questions about development of core AppArmor features—the kernel module and the profiling tools. If you are interested in reviewing the code for AppArmor and contributing reviews or patches, this would be the list for you.
- apparmor-announce@forge.novell.com
This is a low traffic list announcing the availability of new releases or features.
27.4. Troubleshooting
This section lists the most common problems and error messages that may occur using Novell AppArmor.
27.4.1. How to React to odd Application Behavior?
If you notice odd application behavior or any other type of application problem, you should first check the reject messages in the log files to see if AppArmor is too closely constricting your application. To check reject messages, start + and go to . Select and for the application audit report. You can filter dates and times to narrow down the specific periods when the unexpected application behavior occurred.
If you detect reject messages that indicate that your application or service is too closely restricted by AppArmor, update your profile to properly handle your use case of the application. Do this with the in YaST, as described in Section 22.5, “Updating Profiles from Log Entries”.
If you decide to run your application or service without AppArmor
protection, remove the application's profile from
/etc/apparmor.d or move it to another location.
27.4.2. My Profiles do not Seem to Work Anymore …
If you have been using previous versions of AppArmor and have updated your system (but kept your old set of profiles) you might notice some applications which seemed to work perfectly before you updated behaving strangely, or not working at all .
This version of AppArmor introduces a set of new features to the profile syntax and the AppArmor tools that might cause trouble with older versions of the AppArmor profiles. Those features are:
File Locking
Network Access Control
The
SYS_PTRACECapabilityDirectory Path Access
The current version of AppArmor mediates file locking and introduces a new
permission mode (k) for this. Applications requesting
file locking permission might misbehave or fail altogether if confined
by older profiles which do not explicitly contain permissions to lock
files. If you suspect this being the case, check the log file under
/var/log/audit/audit.log for entries like the
following:
type=APPARMOR_DENIED msg=audit(1188913493.299:9304): operation="file_lock" requested_mask="::k" denied_mask="::k" fsuid=1000 name="/home/tux/.qt/.qtrc.lock" pid=25736 profile="/usr/bin/opera"
Update the profile using the YaST Update Profile Wizard or the aa-logprof command as outlined below.
The new network access control syntax based on the network family and
type specification, described in
Section 20.5, “Network Access Control”, might cause application
misbehavior or even stop applications from working. If you notice a
network-related application behaving strangely, check the log file under
/var/log/audit/audit.log for entries like the
following:
type=APPARMOR_DENIED msg=audit(1188894313.206:9123): operation="socket_create" family="inet" sock_type="raw" protocol=1 pid=23810 profile="/bin/ping"
This log entry means that our example application, /bin/ping in this case, failed to get AppArmor's permission to open a network connection. This permission has to be explicitly stated to make sure that an application has network access. To update the profile to the new syntax, use the YaST Update Profile Wizard or the aa-logprof command as outlined below.
The current kernel requires the SYS_PTRACE
capability, if a process tries to access files in
/proc/. New
profiles need an entry for the file and the capability, where old
profiles only needed the file entry. For example:
pid/fd/*
/proc/*/fd/** rw,
in the old syntax would translate to the following rules in the new syntax:
capability SYS_PTRACE,
/proc/*/fd/**  rw,
To update the profile to the new syntax, use the YaST Update Profile Wizard or the aa-logprof command as outlined below.
With this version of AppArmor, a few changes have been made to the profile rule syntax to better distinguish directory from file access. Therefore, some rules matching both file and directory paths in the previous version might now just match a file path. This could lead to AppArmor not being able to access a crucial directory at all, and thus trigger misbehavior of your application and various log messages. The following examples highlight the most important changes to the path syntax.
Using the old syntax, the following rule would allow access to files and
directories in /proc/net. It would allow directory
access only to read the entries in the directory, but not give access to
files or directories under the directory, e.g.
/proc/net/dir/foo would be matched by the asterisk
(*), but as foo is a file or directory under
dir, it cannot be accessed.
/proc/net/* r,
To get the same behavior using the new syntax, you need two rules
instead of one. The first allows access to the file under
/proc/net and the second allows access to
directories under /proc/net. Directory access can
only be used for listing the contents, not actually accessing files or
directories underneath the directory.
/proc/net/*  r,
/proc/net/*/  r,
The following rule works similarly both under the old and the new
syntax, and allows access to both files and directories under
/proc/net:
/proc/net/** r,
To distinguish file access from directory access using the above
expression in the new syntax, use the following two rules. The first one
only allows to recursively access directories under
/proc/net while the second one explicitly allows
for recursive file access only.
/proc/net/**/  r,
/proc/net/**[^/]  r,
The following rule works similarly both under the old and the new syntax
and allows access to both files and directories beginning with
foo under /proc/net:
/proc/net/foo** r,
To distinguish file access from directory access in the new syntax and
use the ** globbing pattern, use the following two
rules. The first one would have matched both files and directories in
the old syntax, but only matches files in the new syntax due to the
missing trailing slash. The second rule matched neither file nor
directory in the old syntax, but matches directories only in the new
syntax:
/proc/net/**foo  r,
/proc/net/**foo/  r,
The following rules illustrate how the use of the ?
globbing pattern has changed. In the old syntax, the first rule would
have matched both files and directories (four characters, last character
could be any but a slash). In the new syntax, it matches only files
(trailing slash is missing). The second rule would match nothing in the
old profile syntax, but matches directories only in the new syntax. The
last rule matches explicitly matches a file called
bar under /proc/net/foo?.
Using the old syntax, this rule would have applied to both files and
directories:
/proc/net/foo?  r,
/proc/net/foo?/  r,
/proc/net/foo?/bar  r,
To find and resolve issues related to syntax changes, take some time after the update to check the profiles you want to keep and proceed as follows for each application you kept the profile for:
Make sure that AppArmor is running and that the application's profile is loaded.
Start the YaST AppArmor Control Panel and put the application's profile into complain mode. Log entries are made for any actions violating the current profile, but the profile is not enforced and the application's behavior not restricted.
Run the application covering all the tasks you need this application to be able to perform.
Start the YaST Update Profile Wizard to update the application's profile according to the log entries generated while running the application.
Once the profile is updated, put it back into enforce mode via the YaST AppArmor Control Panel.
Using the AppArmor command line tools, you would proceed as follows:
Put the application's profile into complain mode:
aa-complain/path/to/applicationRun the application.
Update the profile according to the log entries made while running the application:
aa-logprof/path/to/applicationPut the resulting profile back into enforce mode:
aa-enforce/path/to/application
27.4.3. How to Confine KDE Applications with AppArmor?
Currently, it is not possible to confine KDE applications to the same extent as any other application, due to the way KDE manages its processes.
If you want to confine KDE applications, choose one of the following approaches, but note that none of them are really suited for a standard setup:
- Create a Single Profile for the Entire KDE Desktop
As all KDE processes are children of one parent process and AppArmor cannot distinguish an individual application's process from the rest, create one huge profile to confine the entire desktop all at once. This approach is only feasible if your setup is a very limited (kiosk-type) one. Maintaining such a profile for a standard KDE desktop (including all of its applications) would be close to impossible.
- Modify KDE's process handling
Using
KDE_EXEC_SLAVES=1andKDE_IS_PRELINKED=1variables force KDE to manage its processes in a way that allows AppArmor to distinguish individual applications from each other and apply profiles to them. This approach might slow down your desktop considerably, as it turns off a crucial optimization for speed. Note that the above mentioned environment variables have to be set before KDM/XDM/GDM or startx are started. One way to achieve this would be to add them to/etc/security/pam_env.conf.
27.4.4. How to Resolve Issues with Apache?
Apache is not starting properly or it is not serving Web pages and you
just installed a new module or made a configuration change. When you
install additional Apache modules (like
apache2-mod_apparmor) or make configuration changes
to Apache, you should profile Apache again to catch any additional rules
that need to be added to the profile.
27.4.5. Why are the Reports not Sent by E-Mail?
When the reporting feature generates an HTML or CSV file that exceeds the default size, the file is not sent. Mail servers have a default hard limit for e-mail size. This limitation can impede AppArmor's ability to send e-mails that are generated for reporting purposes. If your mail is not arriving, this could be why. Consider the mail size limits and check the archives if e-mails have not been received.
27.4.6. How to Exclude Certain Profiles from the List of Profiles Used?
AppArmor always loads and applies all profiles that are available in its
profile directory (/etc/apparmor.d/). If you decide
not to apply a profile to a certain application, delete the appropriate
profile or move it to another location where AppArmor would not check for
it.
27.4.7. Can I Manage Profiles for Applications not Installed on my System?
Managing profiles with AppArmor requires you to have access to the log of
the system on which the application is running. So you do not need to
run the application on your profile, build host as long as you have
access to the machine that runs the application. You can run the
application on one system, transfer the logs
(/var/log/audit.log or, if
audit is not installed,
/var/log/messages) to your profile build host and
run aa-logprof -f
path_to_logfile.
27.4.8. How to Spot and fix AppArmor Syntax Errors?
Manually editing Novell AppArmor profiles can introduce syntax errors. If you attempt to start or restart AppArmor with syntax errors in your profiles, error results are shown. This example shows the syntax of the entire parser error.
localhost:~ # rcapparmor start
Loading AppArmor profiles AppArmor parser error in /etc/apparmor.d/usr.sbin.squid at line 410: syntax error, unexpected TOK_ID, expecting TOK_MODE
 Profile /etc/apparmor.d/usr.sbin.squid failed to load
Using the AppArmor YaST tools, a graphical error message indicates which profile contained the error and requests you to fix it.
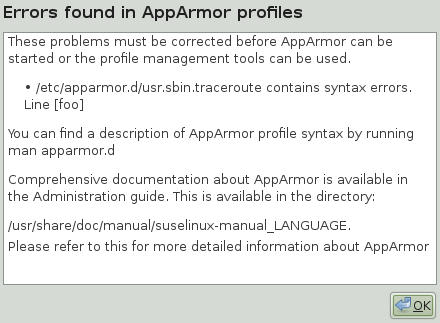 |
To fix a syntax error, log in to a terminal window as root, open
the profile, and correct the syntax. Reload the profile set with
rcapparmor reload.
27.5. Reporting Bugs for AppArmor
The developers of AppArmor are eager to deliver products of the highest quality. Your feedback and your bug reports help us keep the quality high. Whenever you encounter a bug in AppArmor, file a bug report against this product:
Use your Web browser to go to https://bugzilla.novell.com/index.cgi.
Enter the account data of your Novell account and click
or
Create a new Novell account as follows:
Click on the page.
Provide a username and password and additional address data and click to immediately proceed with the login creation.
or
Provide data on which other Novell accounts you maintain to sync all these to one account.
Check whether a problem similar to yours has already been reported by clicking . Use a quick search against a given product and keyword or use the .
If your problem has already been reported, check this bug report and add extra information to it, if necessary.
If your problem has not been reported yet, select from the top navigation bar and proceed to the page.
Select the product against which to file the bug. In your case, this would be your product's release. Click .
Select the product version, component (AppArmor in this case), hardware platform, and severity.
Enter a brief headline describing your problem and add a more elaborate description including log files. You may create attachments to your bug report for screen shots, log files, or test cases.
Click after you have entered all the details to send your report to the developers.