| openSUSE-Dokumentation Chapter 24. Managing Your Digital Image Collection with F-Spot / 24.7. Basic Photo Editing | ||||
|---|---|---|---|---|
 | 24.6. Exporting Image Collections | 24.8. Sharing Photos |  | |
| openSUSE-Dokumentation Chapter 24. Managing Your Digital Image Collection with F-Spot / 24.7. Basic Photo Editing | ||||
|---|---|---|---|---|
| 24.6. Exporting Image Collections | 24.8. Sharing Photos | | |
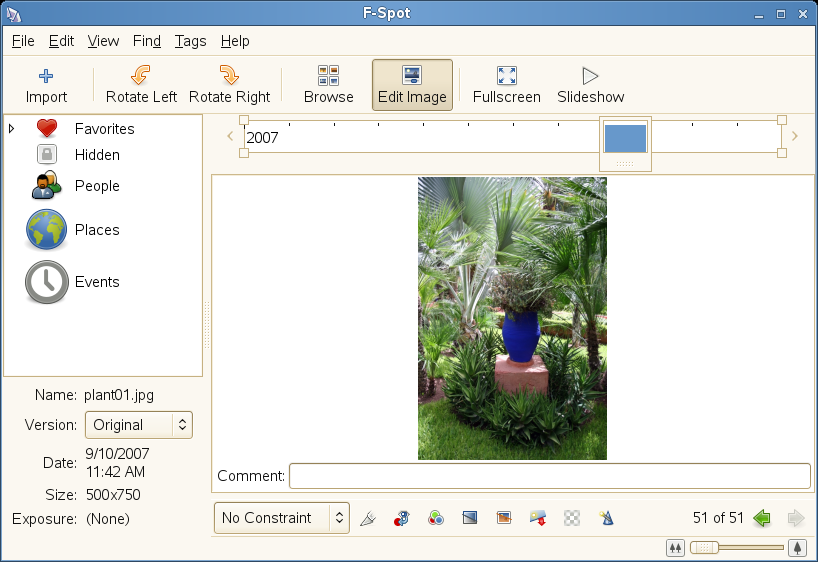
F-Spot offers several basic image editing functions, such as the ability to remove red-eye, crop, and adjust colors and brightness.
When you edit a photo, a new copy (called a version) is created, so your original photo is never altered. After your first edit to a photo, subsequent edits modify the same version. If you want to create multiple versions of a photo (for example, with different cropping or coloring), click +. To access a photo’s original version, click ++.
Select the photo you want to edit.
To enter edit mode, click the icon in the toolbar, double-click the image, or press Enter.
 |
Choose from the following edit functions, using the toolbar below the photo or items on the menu:
|
Function |
Description |
|---|---|
|
|
To adjust the brightness, contrast, and colors of a photo, click the icon to open the adjustment dialog box. Change the settings you want, then click . |
|
|
This effect automatically adjusts color levels to make a color-balanced picture. It works best for pictures taken with automatic white balance. Click the icon to access this feature. |
|
Comment |
You can add a description or a comment to a photo by clicking the text entry box below the photo and entering text. |
|
|
Converts the photo to black and white. |
|
|
Converts the photo to sepia tones. |
|
|
Cropping an image is a great way to improve the quality of a photograph by improving how it is framed. You crop a photo by selecting the part of the photo you want to keep. If you want your photo to be the exact dimensions necessary for a certain print size, you can constrain the kind of selection F-Spot will allow you to draw by choosing the appropriate size from the drop-down list. See the description of the Remove Red-Eye function for details on making a selection on your photo. After you make your crop selection, click the icon beneath the photo to finalize the crop. If you are working with the original photo, cropping creates a new version of your photo. |
|
|
To remove red-eye from a photo, select a zone containing the eyes. You might want to zoom in on the image to accurately select the eyes in the photo. You should be able to correct both eyes on the same person at once, or even the eyes from multiple people at once. If this does not work, or if the selected zone contains some vivid red parts (such as lips), you will probably have to correct one red eye at a time. To make your selection, click one corner of the rectangle that will be your selection, then drag your mouse to the diagonal corner and release it. You can resize your selection by dragging its edges, and you can move it by clicking in the middle of it and dragging it to where you want it. After you have selected a zone, remove the red by clicking the icon beneath the photo. |
|
Sharpen |
Access this function by clicking +. Adjust the values for , , and to your needs, then click . |
|
|
Sharpening one region of a picture while blurring all the rest is a way to emphasize a particular area and grab attention. The soft focus effect is a way to emulate a lens that allows shooting with a short distance in front of and beyond the subject that appears to be in focus. Choose the central point of the area you want to be in focus, then click the icon beneath the photo. Adjust the amount of blurring, then click . |
|
|
The Straighten effect helps you level a photo and is useful when editing landscapes taken without a tripod (when the imaginary line of horizon is not at 0°). This tool rotates a photo by a specified angle and automagically crops the resulted image so that you always see a perfect rectangle. |
(Optional) If you want to edit another photo, use the arrow keys at the bottom right to switch to a new photo.
To exit the edit mode, click on the toolbar.
![[Tip]](admon/tip.png) | |
Professional image editing can also be done with The GIMP. For more information, see Chapter 22, Manipulating Graphics with The GIMP. | |


