Contents
Abstract
Modern telecommunication means far more than just making a phone call. It is also about text messaging and sometimes even video conferencing. Roaming enables you to be reachable under one phone number all across the world. Ekiga brings these features to your Linux desktop, allowing you to communicate over broadband Internet.
Before starting, make sure that the following requirements are met:
Your sound card is properly configured.
A headset or a microphone and speakers are connected to your computer.
For dialing in to regular phone networks, a SIP account is required. SIP (Signaling protocol for Internet Telephony) is the protocol used to establish sessions for audio and video conferencing or call forwarding. There are many VoIP providers all over the world. For a quick start, have a look at the service that the Ekiga project provides at http://www.ekiga.net.
For video conferencing, a webcam is connected to your computer.
On first start, Ekiga opens a configuration assistant that requests all data needed to configure Ekiga. Proceed as follows:
Enter your full name (name and surname).
Enter your
ekiga.netaccount data or choose not to sign up with ekiga.net.To add other accounts later, configure them using +.
Enter your
Ekiga Call Out Accountdata or choose not to sign up with ekiga.net.Determine your connection type.
Choose the audio manager to use. Accept the default setting , as it guarantees the best sound quality. Other sound systems, like OSS, are not available on openSUSE.
By default, there is no ringing device set. If you want a ring tone, change this to one of your available audio devices.
Choose the video input device, if available.
Check the summary of your settings and apply them.
If registration fails after making changes to your configuration, just restart Ekiga.
Ekiga allows you to maintain multiple accounts. To configure an additional account, proceed as follows:
Open +.
Choose +. If unsure, select .
Enter the to which you want to register. This is usually an IP address or a host name that will be given to you by your Internet Telephony Service Provider. Enter , and according to the data provided by your provider.
Leave the configuration dialog with and activate the account. The status of your account displayed in the Ekiga main window changes to .
The Ekiga user interface has several tabs available. The first tab is , the second is and the last one is . In addition, there is a tab available, which displays pictures and videos of local or remote webcams.
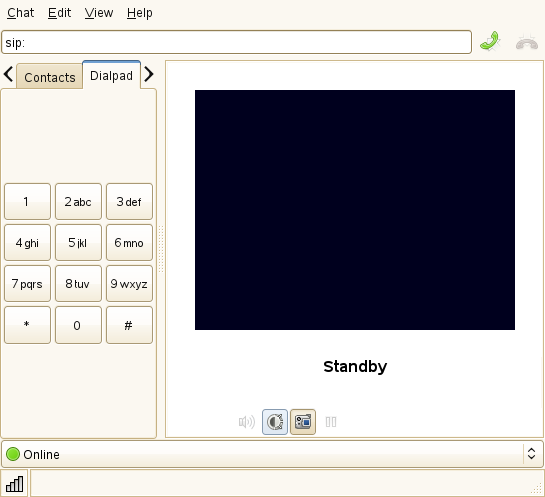
The user interface has different modes. To switch between views, use the tab line. By default, Ekiga opens the tab. There, a local addressbook lets you quickly open connections to often-used numbers. To get a full view with webcam support and audio controls, activate the with +.
At the bottom of the , there are icons for several controls like , , and . All icons provide a tool tip that is activated by the mouse pointer hovering over the icon. Some settings like the settings may only be changed during a phone call.
Many of the functions of Ekiga are available with keyboard shortcuts. Table 12.1, “Keyboard Shortcuts for Ekiga” summarizes the most important ones.
Table 12.1. Keyboard Shortcuts for Ekiga
|
Ctrl Sequence |
Description |
|---|---|
|
Ctrl+O |
Initiate a call with the current number. |
|
Esc |
Hang up. |
|
Ctrl+N |
Add a contact to your address book. |
|
Ctrl+B |
Open the dialog. |
|
H |
Hold the current call. |
|
T |
Transfer the current call to another party. |
|
M |
Suspend the audio stream of the current call. |
|
P |
Suspend the video stream of the current call. |
|
Ctrl+W |
Close the Ekiga user interface. |
|
Ctrl+Q |
Quit Ekiga. |
|
Ctrl+E |
Start the account manager. |
|
Ctrl+J |
Activate the on the main user interface. |
|
Ctrl++ |
Zoom in to the picture from the Web cam. |
|
Ctrl+- |
Zoom out on the picture from the Web cam. |
|
Ctrl+0 |
Return to the normal size of the Web cam display. |
|
F11 |
Use full screen for the Web cam. |
Once Ekiga is properly configured, making a call is straightforward.
Start Ekiga using the menu or the command line.
Enter the SIP address of the party to call at the prompt. The address should look like:
for direct local calls:
sip:username@domainnameorusername@hostnamesip:username@domainnameoruserid@sipserver
Click or press Ctrl+O and wait for the other party to pick up the phone.
To end the call, click or press Esc.
If you need to tweak the sound parameters during a call, click on the icon in the . A interface that holds the options for and is displayed. Use the sliders to adjust the levels to fit your needs.
Ekiga can receive calls in two different ways. First, the user may be
called directly with sip:user@host. Conversely, make
your calls via an SIP provider. Most SIP providers enable you to get
calls from a normal landline to your VoIP account. Depending on the mode
in which Ekiga is run, there are several ways in which you would be
alerted to an incoming call:
- Normal Application
Incoming calls can only be received and answered if Ekiga is already running. You hear the ring sound on your headset or your speakers. If Ekiga is not running, the call cannot be received.
- Panel Applet
Normally, the Ekiga panel applet would run silently without giving any notice of its existence. This changes as soon as a call comes in. The main window of Ekiga opens and you hear a ring sound on your headset or speakers.
Once you have noticed an incoming call, just click to answer the call then start talking. If you do not want to accept this call, click . It is also possible to transfer the call to another SIP address.
Ekiga has the ability to manage your SIP contacts. All of the contacts are displayed in the tab, shown in the main window after startup. To add a contact or a new contact group, run +.
If you want to add a new group, enter the group name into the bottom input field and press . The new group is then added to the group list and preselected.
The following entries are required for a valid contact:
- Name
Enter the name of your contact. This may be a full name, but you can also use a nickname here.
- SIP Address
Enter a valid SIP address for your contact.
- Groups
If you have many different contacts, add your own groups.
To call a contact from the address book, double-click this contact. The call is initiated immediately.
The official home page of Ekiga is http://www.ekiga.org/. This site offers answers to frequently asked questions as well as more detailed documentation.
For information about the support of the H323
teleconferencing protocol in Linux, see
http://www.voip-info.org/wiki/view/H.323. This is also a
good starting point when searching for projects supporting VoIP.
To set up a private telephone network, you might be interested in the
PBX software Asterisk
http://www.asterisk.org/. Find information about at
http://www.voip-info.org/wiki-Asterisk.