| openSUSE-Dokumentation Chapter 3. Customizing Your Settings / 3.2. Configuring Desktop Objects | ||||
|---|---|---|---|---|
 | Chapter 3. Customizing Your Settings | 3.3. Configuring the Main Menu |  | |
| openSUSE-Dokumentation Chapter 3. Customizing Your Settings / 3.2. Configuring Desktop Objects | ||||
|---|---|---|---|---|
| Chapter 3. Customizing Your Settings | 3.3. Configuring the Main Menu | | |
Your KDE desktop comes with a predefined set of desktop icons. By adding various objects such as folders, files, or links, you can create additional icons on your desktop and arrange them as you like.
Procedure 3.1. Creating and Arranging Desktop Icons
To add a new desktop object, for example, from the main menu or the Konqueror file manager, select an entry and drag it onto the desktop. A context menu appears from which to choose whether to copy, move, or create a link to the object.
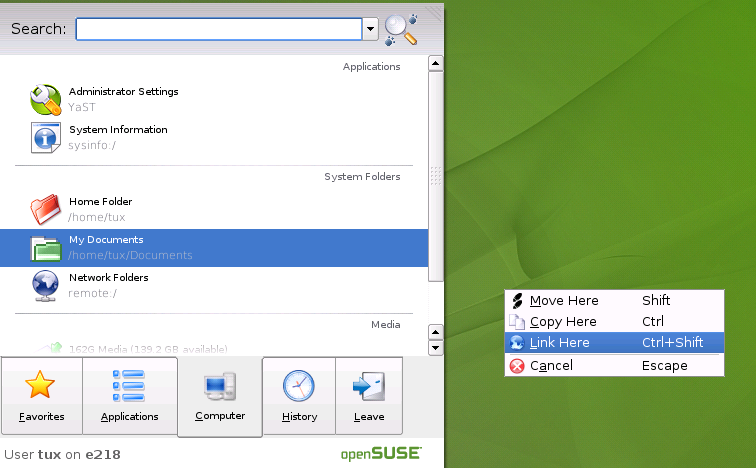 |
To add a new desktop object, you can also right-click an empty space on the desktop and select . From the submenu, choose the type of object to create on the desktop: a folder, one of several types of files, or a link to an application, a file, a Web site, or a device like your CD-ROM drive.
To arrange the icons on your desktop, right-click an empty space on the desktop and select one of the options under .
You can change the background colors of your desktop or select a picture to use as the background. Because KDE offers virtual desktops, you can apply these changes to one or all of your virtual desktops.
Procedure 3.2. Changing the Desktop Background
Right-click an empty patch of the desktop and select . A configuration dialog appears.
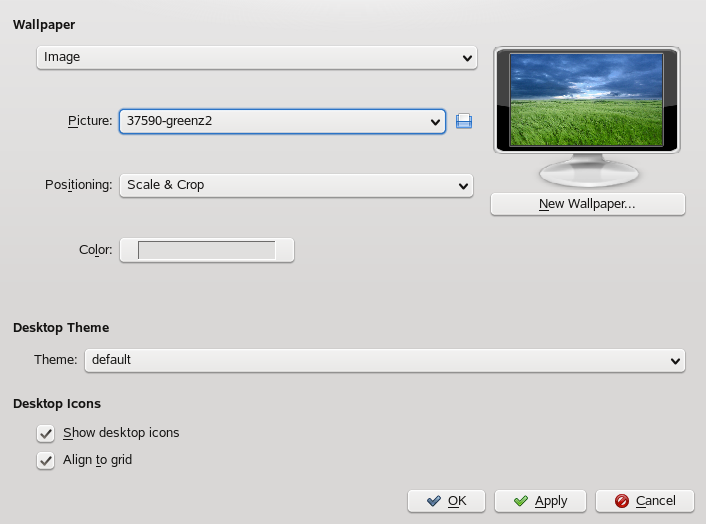 |
In select the virtual desktops to which the changes should apply.
To change the picture on the background, click and select one of the pictures in the list. To use a custom picture, click the folder button beneath the list and select an image file from the file system.
Click to have multiple images appear in a slide show mode.
If you do not want a picture on the background, click .
From the group, click the left button below to select the color for your background. For a multicolor background, set to an option other than and click the right button below to select a second color.
Click then to close the configuration dialog.
openSUSE® comes with predefined screen saver settings that you can adjust.
Procedure 3.3. Configuring the Screen Saver
Right-click an empty space on the desktop and select .
In the dialog that opens, click .
In the list of screen savers, click a screen saver to see a preview in the right side of the dialog.
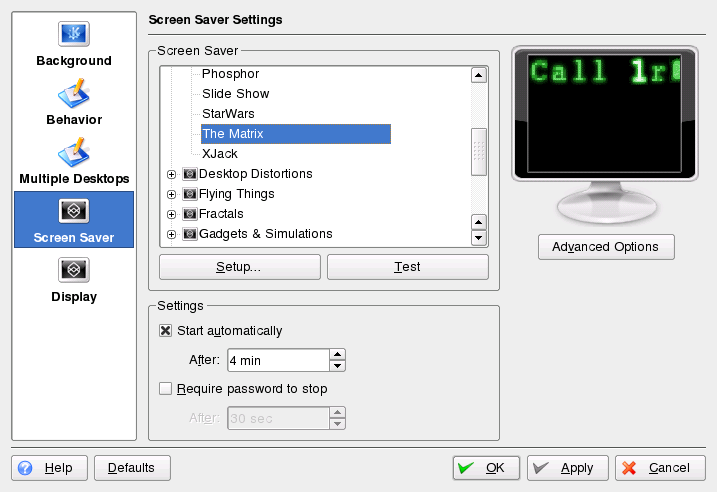 |
Click to adjust options like speed or shapes.
You can also choose to view a blank screen instead or to let KDE start a random screen saver. Find these options at the end of the screen saver list.
Under , determine after how long a time of inactivity the screen saver should start and whether a password is required to unlock the screen after the screen saver has started.
Click to apply the changes and close the configuration dialog.
Some users might need more desktops than provided by default.
Procedure 3.4. Adding Additional Virtual Desktops
Right-click the desktop previewer in the panel and select . A configuration dialog appears where you can increase or reduce the number of virtual desktops. You can also change the default names of the desktop.
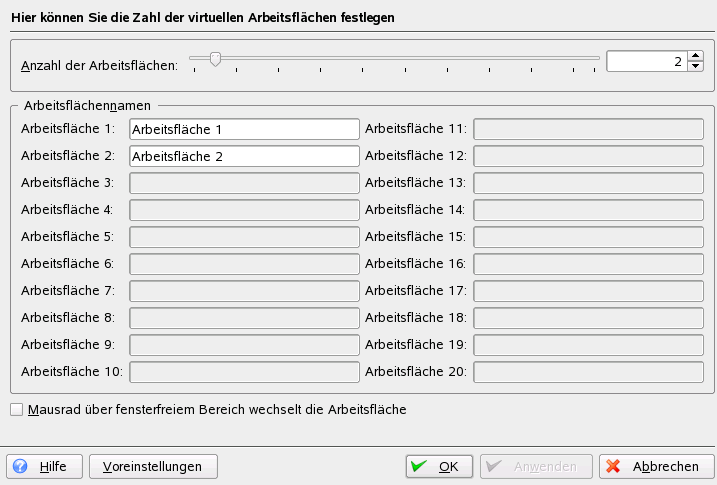 |
Click to apply the changes and close the configuration dialog.
For the names of the desktops to appear in the desktop previewer rather than the number, right-click the desktop previewer and select +.
