| openSUSE-Dokumentation Part II. Managing Files and Resources / Chapter 7. Managing Print Jobs | ||||
|---|---|---|---|---|
 | 6.2. Configuring Kerry | 7.2. Monitoring Print Jobs in KDE |  | |
| openSUSE-Dokumentation Part II. Managing Files and Resources / Chapter 7. Managing Print Jobs | ||||
|---|---|---|---|---|
| 6.2. Configuring Kerry | 7.2. Monitoring Print Jobs in KDE | | |
Printers can either be connected to your system locally or accessed over a network. There are several ways to set up a printer in openSUSE: with YaST, with iPrint, or on the command line. There are also desktop tools in KDE or GNOME for setting up printers but we recommend to use either YaST (or iPrint???) for this task.
Refer to Abschnitt „Einrichten eines Druckers“ (Kapitel 2, Einrichten von Hardware-Komponenten mit YaST, ↑Start) for detailed information how to configure printers with YaST. For information about how to manage printers with iPrint® refer to the iPrint User Guide at http://www.novell.com/documentation/sled10/.
![[Note]](admon/note.png) | Troubleshooting |
|---|---|
If you have problems configuring your printer, ask your system administrator. An in-depth coverage of printer configuration for administrators can be found in Kapitel Druckerbetrieb (↑Referenz). | |
This chapter describes how to set up printers with the KDE Printing Manager. After configuring the printer correctly, you can address it from any application.
In KDE, you usually start print jobs with KPrinter. This application is started automatically each time you print from a KDE application. In the KPrinter dialog, choose a printer and edit the of your print job, such as page orientation, pages per sheet, and duplex printing.
![[Tip]](admon/tip.png) | Sending Files to a Printer without Opening the Application |
|---|---|
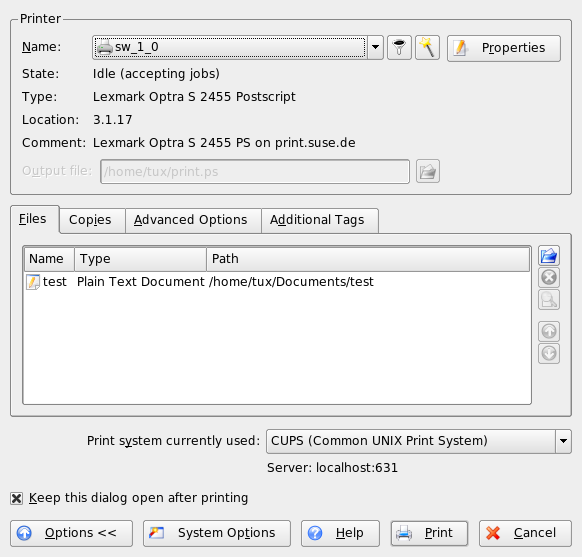
You can also start KPrinter manually by pressing Alt+F2 and entering kprinter. This is useful if you want to print one or several files without starting the application to view or edit the file. The KPrinter dialog then additionally includes the tab, where you can determine the files to print. Either drag them from the desktop and drop them into the list or use the file dialog to locate them. | |
To specify the number of copies and various other options, click at the bottom left. The window then expands and shows three tabs: , , and . See Figure 7.1, “Starting a Print Job with KPrinter”.
The tab determines the page selection (all pages of the selected document, the currently selected one, or a range) and the number of copies. You may also choose to print only the even or only the odd numbered pages of the selected document. Use to specify any additional information for the print job. Enter any if needed or set a custom page label at the top and bottom of the page. The can also be set here. The last tab, is rarely needed. Once your print job has been filed, you can watch its progress using KJobViewer.