| openSUSE-Dokumentation Chapter 17. Instant Messaging with Pidgin / 17.2. Adding an Account | ||||
|---|---|---|---|---|
 | Chapter 17. Instant Messaging with Pidgin | 17.3. Managing Your Buddy List |  | |
| openSUSE-Dokumentation Chapter 17. Instant Messaging with Pidgin / 17.2. Adding an Account | ||||
|---|---|---|---|---|
| Chapter 17. Instant Messaging with Pidgin | 17.3. Managing Your Buddy List | | |
To use Pidgin, you must already have accounts on the systems you want to use. For example, to use Pidgin for your AIM account, you must first have an AIM account. Once you have those accounts, set them up in the Pidgin dialog.
Start Pidgin by clicking +++.
Click + to open the dialog box.
The first time you run Pidgin, or any subsequent time you start Pidgin when you don’t have any accounts set up, the dialog box opens automatically.
Click to open the dialog.
Select the protocol you want to set up.
The dialog differs for each protocol, depending on what setup options are available for that protocol.
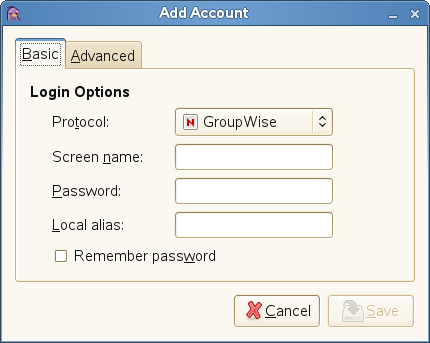 |
Enter the setup options for the chosen protocol.
Typical options include your account name and password. Your protocol might support additional options, such as a buddy icon, alias, login options, or others.
Click .
Repeat Steps 2 to 5 for each additional protocol.
After an account is added, you can log in to that account by entering your password in the Pidgin login dialog box.
