| openSUSE-Dokumentation Chapter 10. Encryption with Passwords and Encryption Keys / 10.9. Encryption Preferences | ||||
|---|---|---|---|---|
 | 10.8. File Manager Integration | Part II. Communication and Collaboration |  | |
| openSUSE-Dokumentation Chapter 10. Encryption with Passwords and Encryption Keys / 10.9. Encryption Preferences | ||||
|---|---|---|---|---|
| 10.8. File Manager Integration | Part II. Communication and Collaboration | | |
Click +++.
Click +, then click the tab.
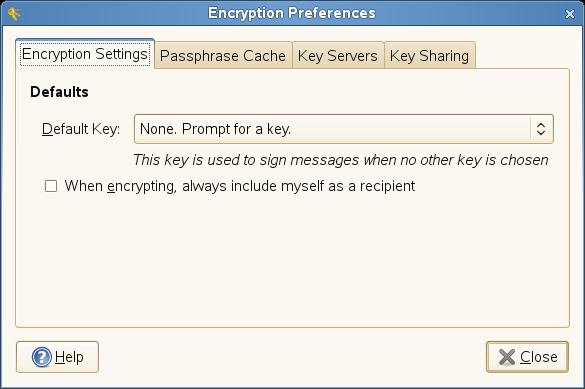 |
Choose from the following options:
Default Key: Specifies the key you want to use to sign files. Files will be encrypted to this key if the option is selected.
When encrypting, always include myself as a recipient: Select this option to add yourself to the recipients list for all files encrypted by Passwords and Encryption Keys. If you do not select this option, and you do not select yourself as a recipient, you cannot decrypt any files you encrypt.
Click .
Enabling Passwords and Encryption Keys's passphrase caching ability
allows you to perform many operations that require entering your
passphrase without reentering it every time
seahorse-daemon takes the place of
gpg-agent. Letting the cached passphrases
expire is usually a good idea. This will then require reentering your
passphrase, but adds security.
Click +++.
Click +, then click the tab.
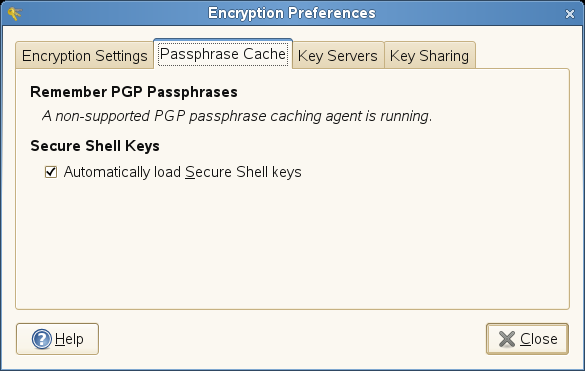 |
Choose from the following options:
Never remember passphrases: Select this option to not remember any passphrase.
Remember passphrases for ... minutes: Specifies the amount of time, in minutes, for storing passphrases.
Always remember passphrases whenever logged in: Select this option to remember any passphrases whenever you are logged in to the session.
Ask me before using a cached passphrase: Select this option to ask you before a stored passphrase is used.
Automatically load Secure Shell keys: Select this option to automatically cache any Secure Shell key.
Click .
You can keep your keys up to date by syncing keys periodically with remote keyservers. Syncing will make sure that you have the latest signatures made on all of your keys so that the web of trust will be the most useful.
Click +++.
Click +, then click the tab.
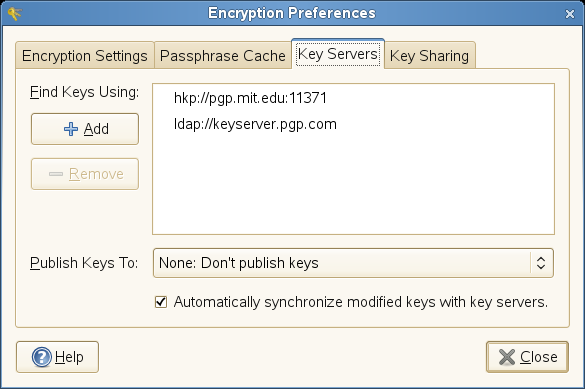 |
Passwords and Encryption Keys provides support for HKP and LDAP keyservers.
HKP Servers: HKP keyservers are ordinary Web-based keyservers such as the popular hkp://pgp.mit.edu:11371, also accessible at http://pgp.mit.edu.
LDAP Keyservers: LDAP keyservers are less common, but use the standard LDAP protocol to serve keys. ldap://keyserver.pgp.com is a good LDAP server.
Click .
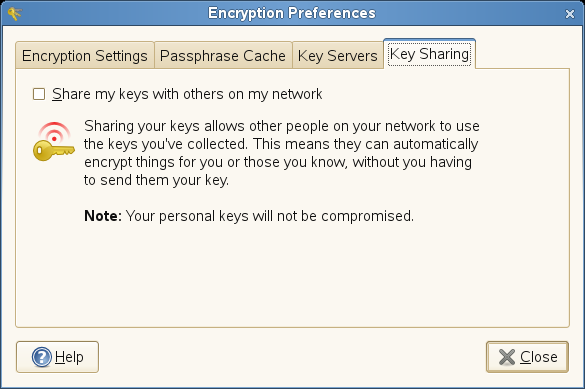
Key Sharing is provided by DNS-SD, also known as Bonjour or Rendevous. Enabling key sharing adds the local Passwords and Encryption Keys users' public key rings to the remote search dialog box. Using these local key servers is generally faster than accessing remote servers.
Click +++.
Click +, then click the tab.
 |
Select .
Click .
