| openSUSE-Dokumentation Chapter 2. Working with Your Desktop / 2.13. Taking Screen Shots | ||||
|---|---|---|---|---|
 | 2.12. Viewing PDF Files and Other Documents | 2.14. Displaying, Decompressing, and Creating Archives |  | |
| openSUSE-Dokumentation Chapter 2. Working with Your Desktop / 2.13. Taking Screen Shots | ||||
|---|---|---|---|---|
| 2.12. Viewing PDF Files and Other Documents | 2.14. Displaying, Decompressing, and Creating Archives | | |
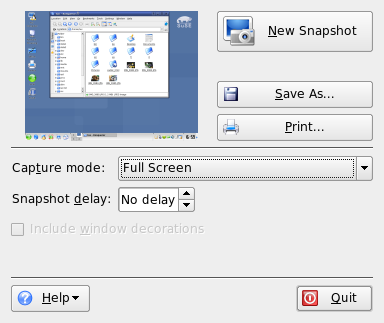
With KSnapshot, you can create snapshots of your screen or individual application windows. Start the program from the main menu or by pressing Alt+F2 and entering ksnapshot. The KSnapshot dialog consists of two parts. The upper area (Current Snapshot) contains a preview of the current screen and three buttons for creating and saving the screen shots. The lower area contains further options for the actual creation of the screen shot.
To take a screen shot, use to determine the time (in seconds) to wait between clicking and the actual creation of the screen shot. If is selected, only the window containing the pointer is saved. To save the screen shot, click and designate the directory and filename for the image in the subsequent dialog. Click to print the screen shot.
You can also use The GIMP to take screen shots. To open The GIMP, press
Alt+F2 and enter gimp. When you run GIMP for the
first time, it installs some files in your home directory and displays
dialogs that give you the opportunity to adapt it to your environment.
For information about using The GIMP, refer to
Chapter Manipulating Graphics with The GIMP (↑Application Guide) or see its help. You may need to install
the help with YaST
(kdeutils3-extra).